Kotlin Quickstart for ADK
This guide shows you how to get up and running with Agent Development Kit for Kotlin. Before you start, make sure you have the following installed:
- Java 17 or later
- Gradle 8.0 or later
Create an agent project
Create an agent project with the following files and directory structure:
my_agent/
    src/main/kotlin/com/example/agent/
                        HelloTimeAgent.kt   # agent definition + tool
                        Main.kt             # entry point
    build.gradle.kts                        # project configuration
    .env                                    # API keys or project IDs
Create this project structure using the command line
Define the agent code
Create the code for a basic agent, including a simple implementation of an ADK
Function Tool, called getCurrentTime().
Add the following code to the HelloTimeAgent.kt file in your project
directory:
package com.example.agent

import com.google.adk.kt.agents.Instruction
import com.google.adk.kt.agents.LlmAgent
import com.google.adk.kt.annotations.Param
import com.google.adk.kt.annotations.Tool
import com.google.adk.kt.models.Gemini

class TimeService {
    /** Mock tool implementation */
    @Tool
    fun getCurrentTime(
        @Param("Name of the city to get the time for") city: String
    ): Map<String, String> {
        return mapOf("city" to city, "time" to "The time is 10:30am.")
    }
}

object HelloTimeAgent {
    @JvmField
    val rootAgent = LlmAgent(
        name = "hello_time_agent",
        description = "Tells the current time in a specified city.",
        model = Gemini(
            name = "gemini-flash-latest",
            apiKey = System.getenv("GOOGLE_API_KEY")
                ?: error("GOOGLE_API_KEY environment variable not set."),
        ),
        instruction = Instruction(
            "You are a helpful assistant that tells the current time in a city. "
                + "Use the 'getCurrentTime' tool for this purpose."
        ),
        tools = TimeService().generatedTools(),
    )
}
About @Tool and KSP
The @Tool annotation marks a function as a tool that the agent can
call. At compile time, a KSP (Kotlin Symbol Processing) annotation
processor generates the .generatedTools() extension function used above.
This is a zero-reflection approach to function tool registration. The
required KSP plugin and processor dependency are included in the
build.gradle.kts configuration below.
Configure project and dependencies
An ADK Kotlin agent project requires the following dependencies in your
build.gradle.kts project file:
dependencies {
    implementation("com.google.adk:google-adk-kotlin-core:0.1.0")
    ksp("com.google.adk:google-adk-kotlin-processor:0.1.0")
}
Complete build.gradle.kts configuration for project
The following code shows a complete build.gradle.kts configuration for
this project:
plugins {
    kotlin("jvm") version "2.1.20"
    id("com.google.devtools.ksp") version "2.1.20-2.0.1"
    application
}

repositories {
    mavenCentral()
}

dependencies {
    implementation("com.google.adk:google-adk-kotlin-core:0.1.0")
    implementation("com.google.adk:google-adk-kotlin-webserver:0.1.0")
    ksp("com.google.adk:google-adk-kotlin-processor:0.1.0")
}

kotlin {
    jvmToolchain(17)
}

application {
    mainClass.set(
        project.findProperty("mainClass") as? String
            ?: "com.example.agent.MainKt"
    )
}
Set your API key
This project uses the Gemini API, which requires an API key. If you don't already have Gemini API key, create a key in Google AI Studio on the API Keys page.
In a terminal window, write your API key into your .env file of your project
to set environment variables:
Using other AI models with ADK
ADK supports the use of many generative AI models. For more information on configuring other models in ADK agents, see Models & Authentication.
Create an entry point
Create a Main.kt file to run and interact with HelloTimeAgent from the
command line. ReplRunner provides a built-in interactive REPL that handles
user input, agent responses, and tool confirmation prompts.
package com.example.agent

import com.google.adk.kt.runners.ReplRunner

fun main() {
    ReplRunner(HelloTimeAgent.rootAgent).start()
}
Run your agent
You can run your ADK agent using the interactive command-line REPL
or the ADK web user interface provided by AdkWebServer. Both options
allow you to test and interact with your agent.
Run with command-line interface
Run your agent with the command-line interface using the Gradle run task:
The agent starts an interactive session. Type a message and press Enter:
Agent hello_time_agent is ready. Type 'exit' to quit.
You > What time is it in New York?
hello_time_agent > The current time in New York is 10:30am.
You > exit
Exiting agent.

Run with web interface
To run your agent with the ADK web interface, add the webserver dependency
to your build.gradle.kts:
dependencies {
implementation("com.google.adk:google-adk-kotlin-core:0.1.0")
implementation("com.google.adk:google-adk-kotlin-webserver:0.1.0")
ksp("com.google.adk:google-adk-kotlin-processor:0.1.0")
}
Then create a WebMain.kt file alongside your Main.kt:
package com.example.agent
import com.google.adk.kt.artifacts.InMemoryArtifactService
import com.google.adk.kt.runners.InMemoryRunner
import com.google.adk.kt.sessions.InMemorySessionService
import com.google.adk.kt.webserver.AdkWebServer
import com.google.adk.kt.webserver.loaders.SingleAgentLoader
import com.google.adk.kt.webserver.telemetry.ApiServerSpanExporter
fun main() {
val agent = HelloTimeAgent.rootAgent
val sessionService = InMemorySessionService()
val artifactService = InMemoryArtifactService()
val server = AdkWebServer(
port = 8080,
sessionService = sessionService,
artifactService = artifactService,
agentLoader = SingleAgentLoader(agent),
runner = InMemoryRunner(
agent = agent,
sessionService = sessionService,
artifactService = artifactService,
),
apiServerSpanExporter = ApiServerSpanExporter(),
)
println("Starting ADK web server on http://localhost:8080...")
server.start(wait = true)
}
Run the web server using the -PmainClass property to select the web
entry point:
# Remember to load keys and settings: source .env OR env.bat
gradle run -PmainClass=com.example.agent.WebMainKt
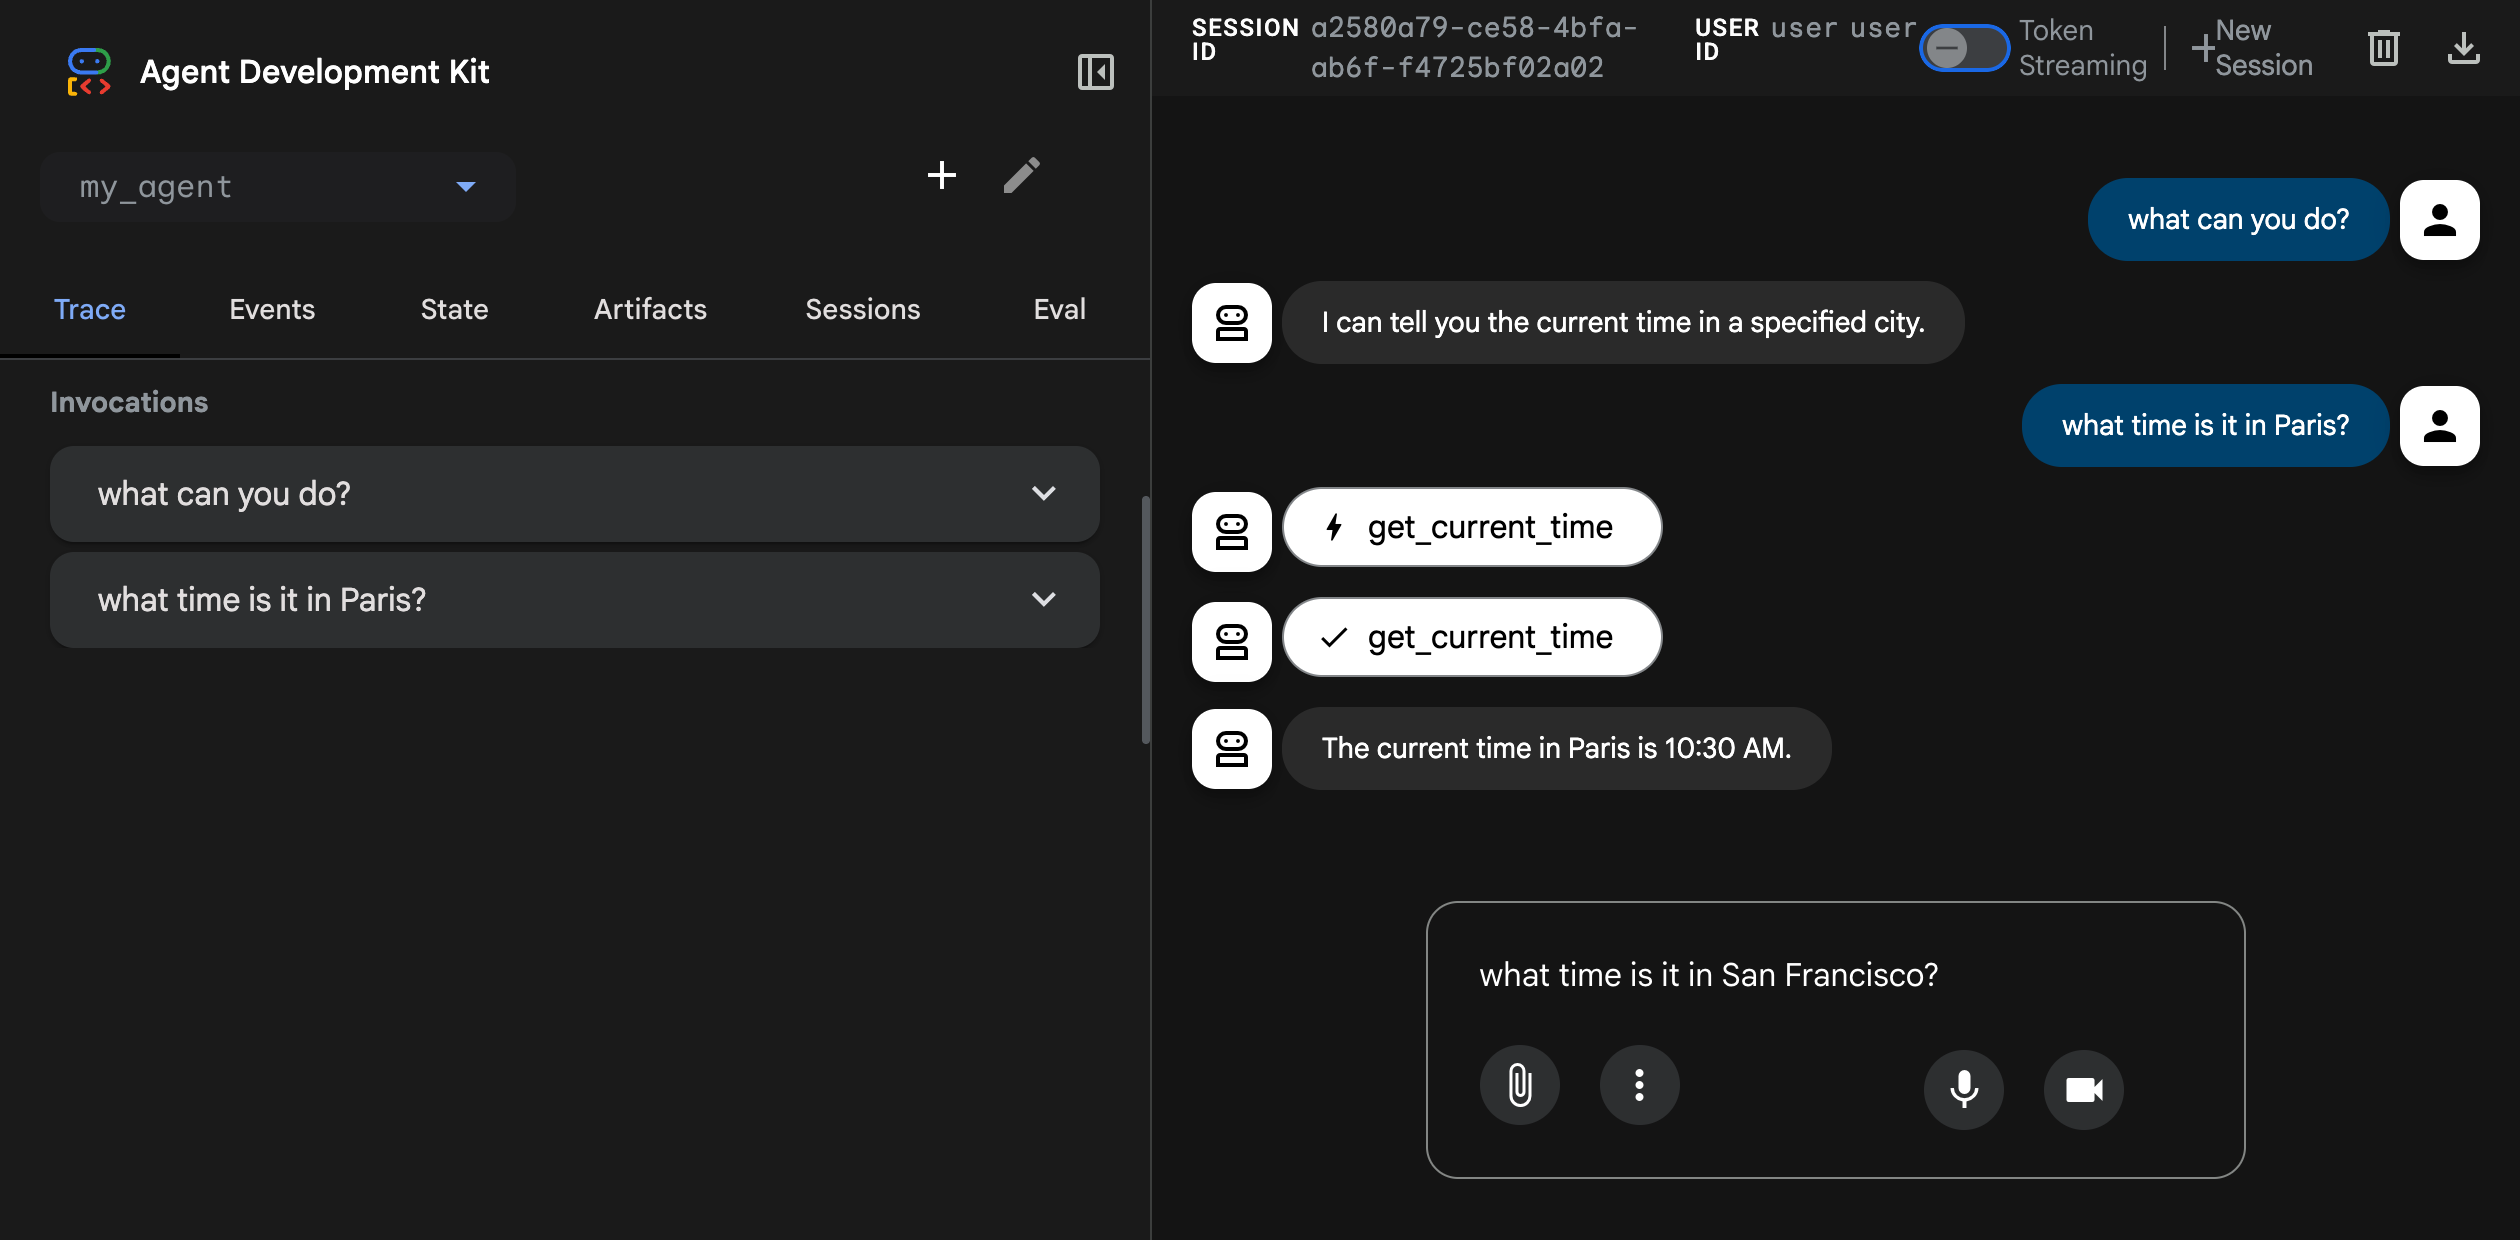
This command starts a web server with a chat interface for your agent. You can access the web interface at (http://localhost:8080). Select your agent at the upper left corner and type a request.
Caution: ADK Web for development only
ADK Web is not meant for use in production deployments. You should use ADK Web for development and debugging purposes only.
Next: Build your agent
Now that you have ADK installed and your first agent running, try building your own agent with our build guides: